Pager Blogger Template is an advance one-pager blogger theme with a multi-functional layout and up-to-the-mark design. It carries a flawless design with limitless scrolling. Pager Blogger Template helps you to create a quick and effective single landing portfolio page or website that can help you to attract more organic and social media visitors.
You can check the live demo or download the template through the button below and also Please Read this documentation carefully in order to set up your blog and please note that there’s no support for free users.
Scrolling Menu
Access your blog Layout > click Edit icon on Scrolling Menu Section widget.
Note : - Updating This menu is little bit complicated, as it doesn't work normally, it helps your blog visitor to scroll smoothly when clicked, but at the same time you can also add live links. In the existing setup don't edit the url, but if you want to add any new label in the menu the simple add desired text with desired url. Note* : - If you will edit the url in current structure then the scrolling effect will not work.
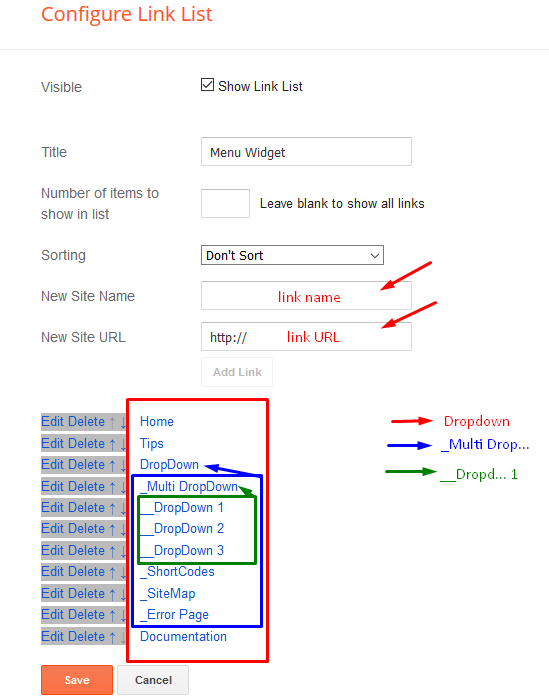
Main Menu/DropDown/Multi DropDown
Access your blog
Layout > click
Edit icon on
Main Menu widget.
Normal Link :
DropdownSub Link:
_Multi Dropdown (before the link add "
_") 1 underscore
Sub Link 2:
__Dropdown 1 (before the link add "
__") 2 underscore
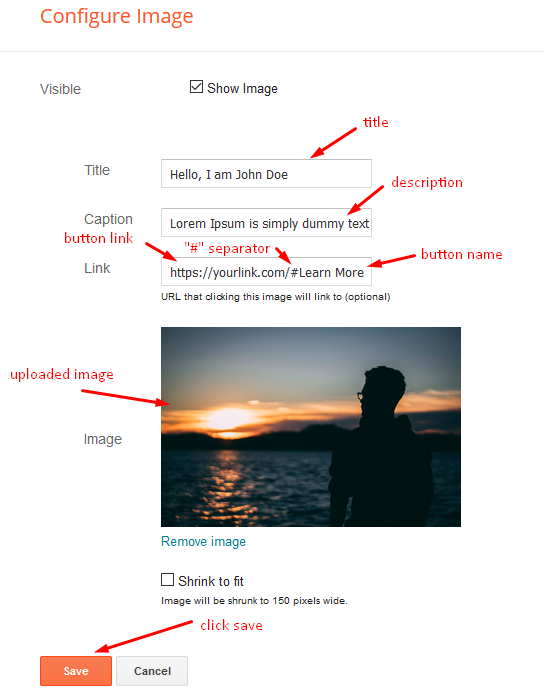
Main Intro
Access your blog
Layout > click
Edit icon > on
Main Intro widget.
Example:
b) Image Background
The theme by default shows a colored css background in the header area, if you want to replace it with your desired image, then just upload the image in main intro section and add true for image background, if you want to revert back to colored background then simply add false in the blank space. Access your blog Layout > click Edit icon > on Main Intro Section > Click Image Background widget.
Service List Widget
Access your blog
Layout > click
Edit icon > on
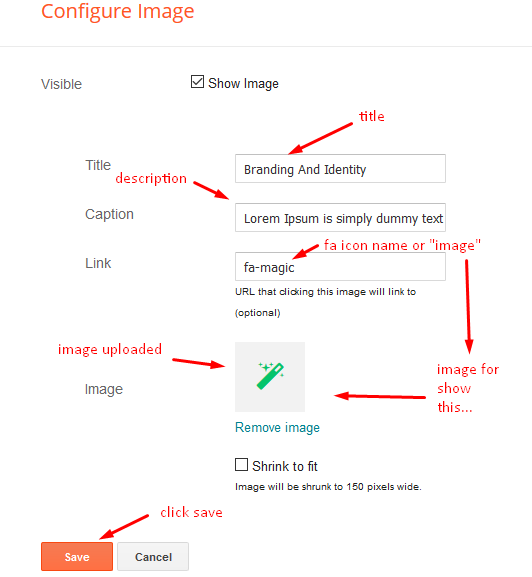
Service List widget's.
Widget Settings
EX:
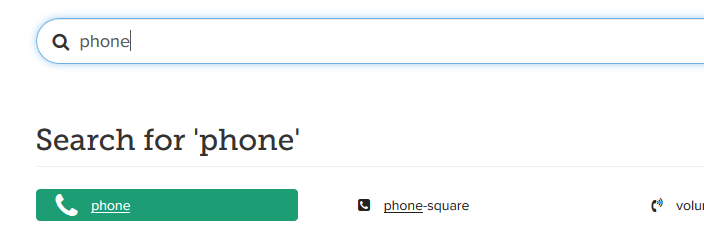
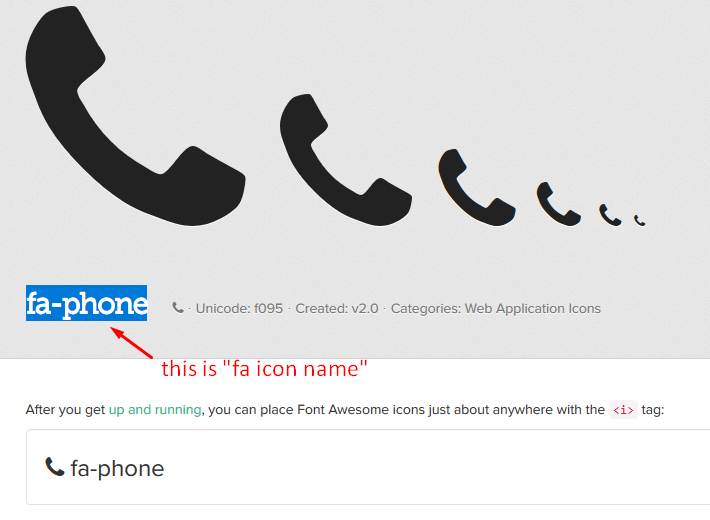
How to get FontAwesome or Remixicon icon name ??Step 1: Go to
https://fontawesome.com/v4.7.0/icons/Find icon
EX:
Step 2: Open icon page and copy "fa icon name".
EX:
Info Box ( 01, 02, 03, 04 )
Access your blog Layout > click Edit icon > on Info Box 01, Info Box 02 or Info Box 03 or Info Box 04 widget.
Featured Image
Access your blog
Layout > click
Edit icon > on
Featured Image widget's.
Widget Settings
EX:
Achievements (Counter)
Access your blog
Layout > click
Edit icon > on
Service List widget's.
Widget Settings
EX:
How to get FontAwesome or Remixicon icon name ??Step 1: Go to
https://fontawesome.com/v4.7.0/icons/Find icon
EX:
Step 2: Open icon page and copy "fa icon name".
EX:
Grid Posts
Access your blog Layout > click Add a Gadget > HTML/JavaScript on Grid Posts section, you must place the following names highlighted in blue below.
Shortcode: Label, recent or random/grid-post
Example: Technology/grid-post
Author Image and Background Image
Access your blog
Layout > click
Edit icon > on
Author Image widget's.
Widget Settings
EX:
Note* : - In background image just add background nothing else.
Headline Text 01, 02, 03 & 04 (Heading and Description)
Access your blog
Layout > click
Edit icon > on
Headline Text 01, 02, 03 & 04 widget's.
Widget Settings
EX:
Featured Posts Widget
Access your blog Layout > click Edit icon > on Featured Posts widget and follow the instructions below.
Shortcode: Results number/Label, recent or random/feat-big
Label Posts: 3/Technology/feat-big
Recent Posts: 3/recent/feat-big
Random Posts: 3/random/feat-big
Main Testimonials
Access your blog Layout > click Edit icon > on Main Testimonial widget.
Info Box 04
Access your blog Layout > click Edit icon > on Info Box 01 & 02 widget.
Brand Logos
Access your blog Layout > click Edit icon on Brand Logos widget.
Post Layouts
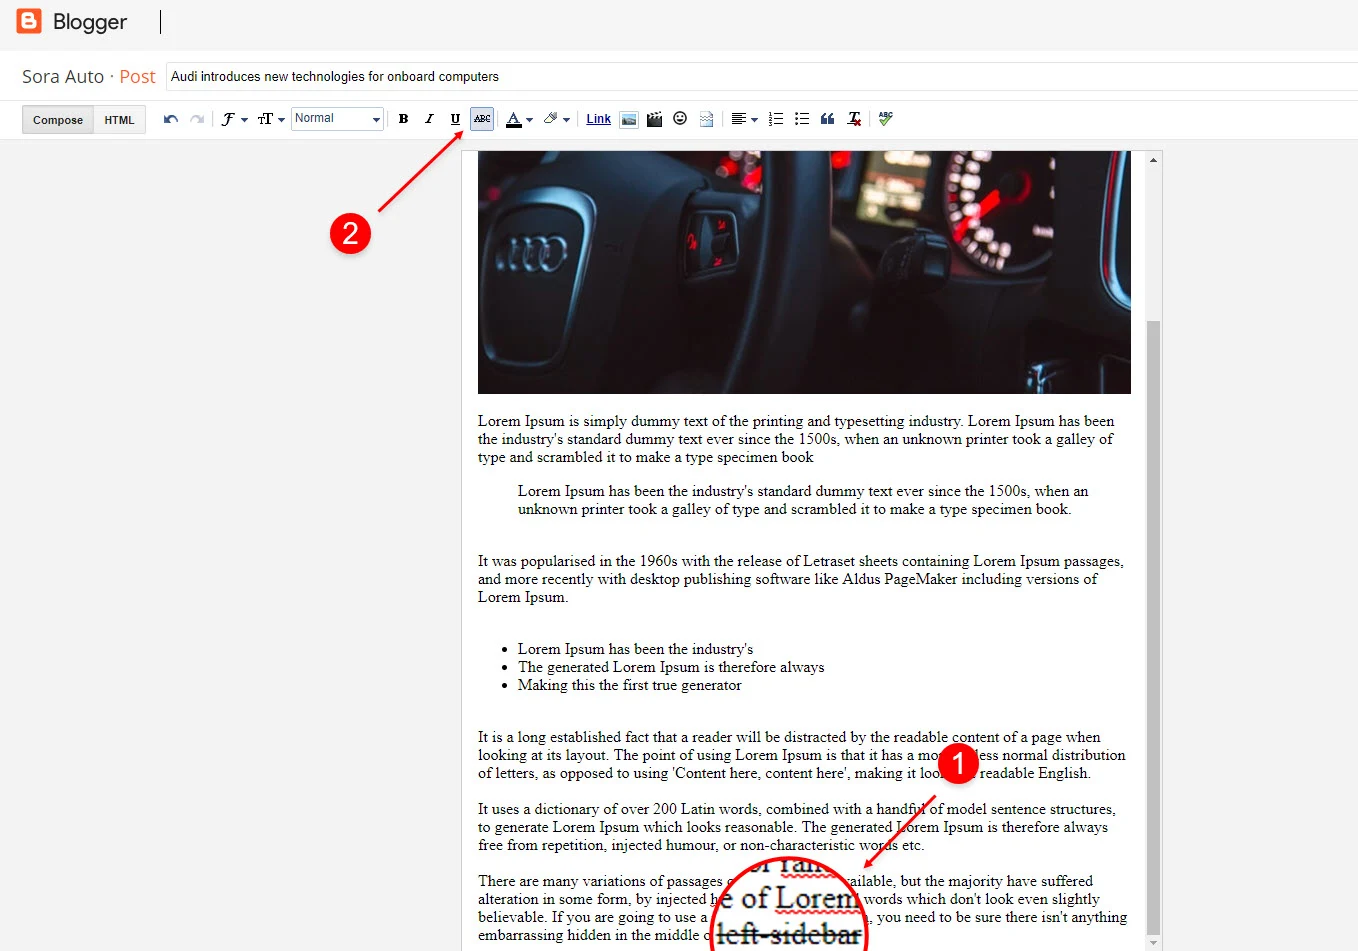
Left Sidebar: Inside the post add the text left-sidebar and add the style Strikethrough
Full Width: Inside the post add the text full-width and add the style Strikethrough
Right Sidebar: Inside the post add the text right-sidebar and add the style Strikethrough
Post List Widget
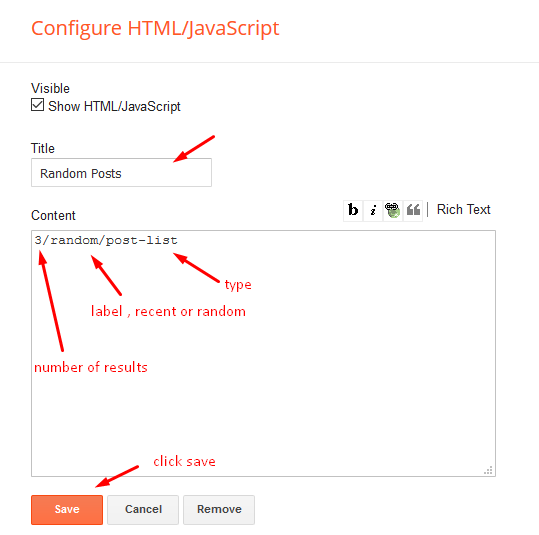
Access your blog Layout > click Add a Gadget > HTML/JavaScript on Sidebar or Footer section and follow the instructions below.
Shortcode: Results number/Label, recent or random/post-list
Label Posts: 3/Technology/post-list
Recent Posts: 3/recent/post-list
Random Posts: 3/random/post-list
Theme Options
Access your blog
Layout > click
Edit icon on
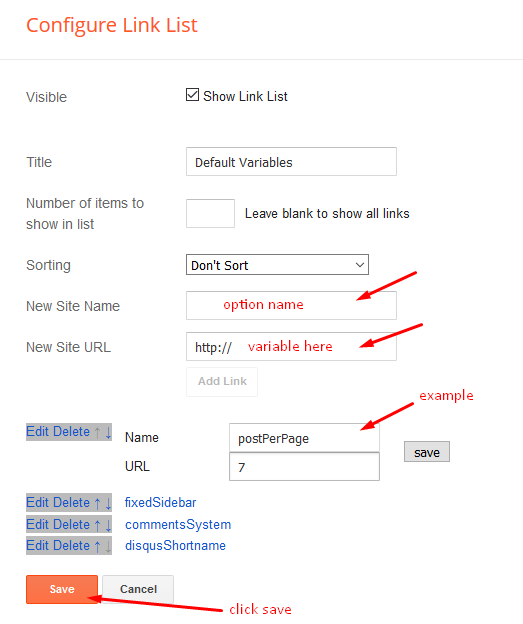
Default Variables widget.
Post Per Page: In
New Site Name add
postPerPage, in
New Site URL add the number of results, it should be the same as the posts from the home page, after click on
save button.
Comments System: In
New Site Name add
commentsSystem, in
New Site URL add the comments sytem type
{blogger, disqus, facebook or hide}, after click on
save button.
Disqus Shortname: In
New Site Name add
disqusShortname, in
New Site URL add your disqus comment system shortname, after click on
save button.
Facebook Page Plugin
Access your blog Layout > click Add a Gadget > HTML/JavaScript on Sidebar or Footer section, and paste the code below.
<center><div class="fb-page" data-href="https://www.facebook.com/soratemplate" data-width="360" data-small-header="false" data-adapt-container-width="true" data-hide-cover="false" data-show-facepile="true"></div></center>
Note: In Attribute data-href replace the link per your facebook page url.
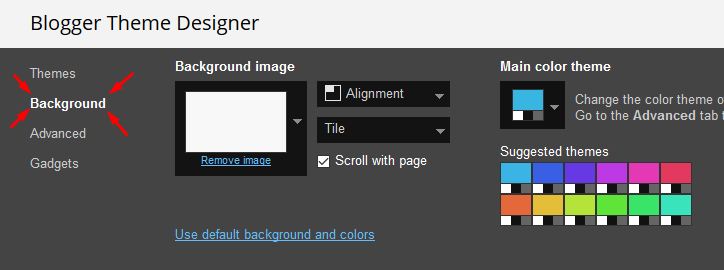
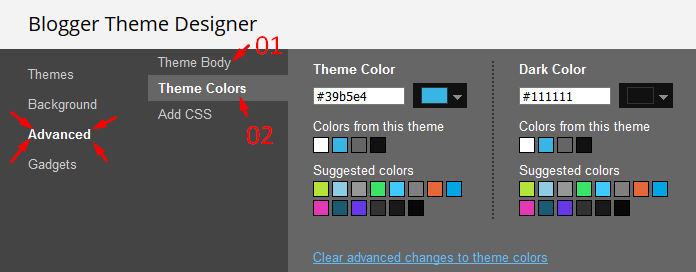
Customizing Your Template
Access your blog Theme > click Customize button.
Here you can change the background, and apply pre-defined colors
Clicking Advanced You will see the official option to change the Main Colors
Installation And Custom Services
We provide plenty of templates for free but if you want something unique for your blog then let us create a unique design for your blog, Just tell us your needs and we will convert your dream design into reality. We also Provide Blogger Template Installation Service. Our Installation service gives you a simple, quick and secure way of getting your template setup without hassle.
Only Premium Buyers will get the widget codes available in the demo.
If you are a premium version user and you are having any problem while setting up the template please contact us by going to this
link (Contact Form).